Many recruiters, HR professionals, and businesses need to gather information about numerous individuals for review, qualification, or other processes. Performing this task manually is inefficient, slow, and prone to errors.
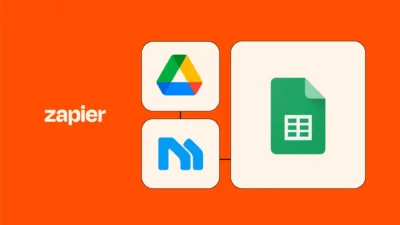
Automating repetitive tasks, such as extracting profile data from Google Sheets, can save valuable time, reduce errors, and streamline workflows. With the MagicalAPI and Zapier integration, you can set up this automation quickly and easily, with no coding skills required.
As we noted previously, “Zapier is a no-code platform that enables you to connect and integrate a wide range of apps… allowing you to build automation tools without requiring any coding skills.” Building on that, this tutorial dives into automating profile data extraction from Google Sheets using Magical API’s Zap templates.
Table of Contents
Understanding Zap Templates for MagicalAPI profile data Integration
Zap Templates are pre-built workflows in Zapier that come with predefined triggers and actions. They simplify the automation process by allowing users to set up workflows quickly and effortlessly, often in just a few clicks.
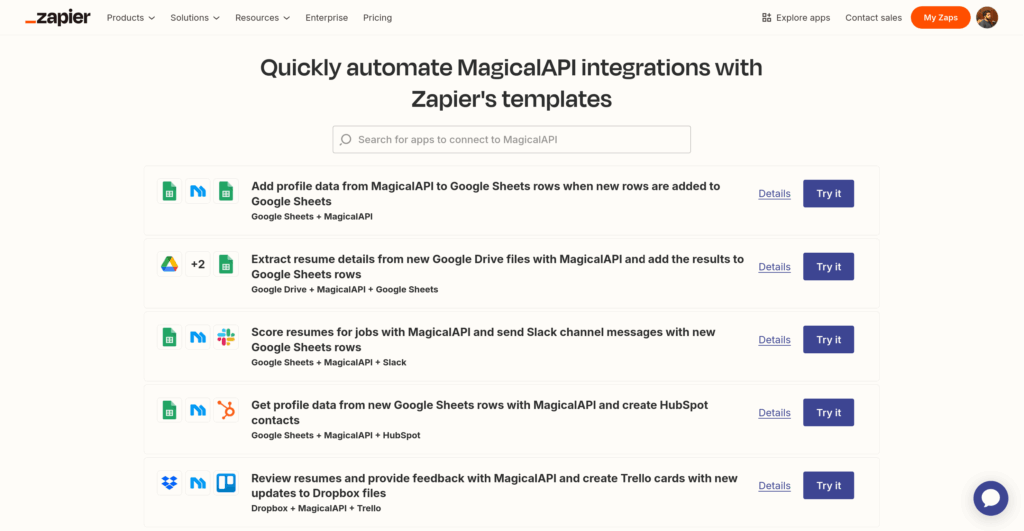
You can explore the list of MagicalAPI’s Zapier integration templates on the integration page:
Automating Profile Data Extraction from Google Sheets
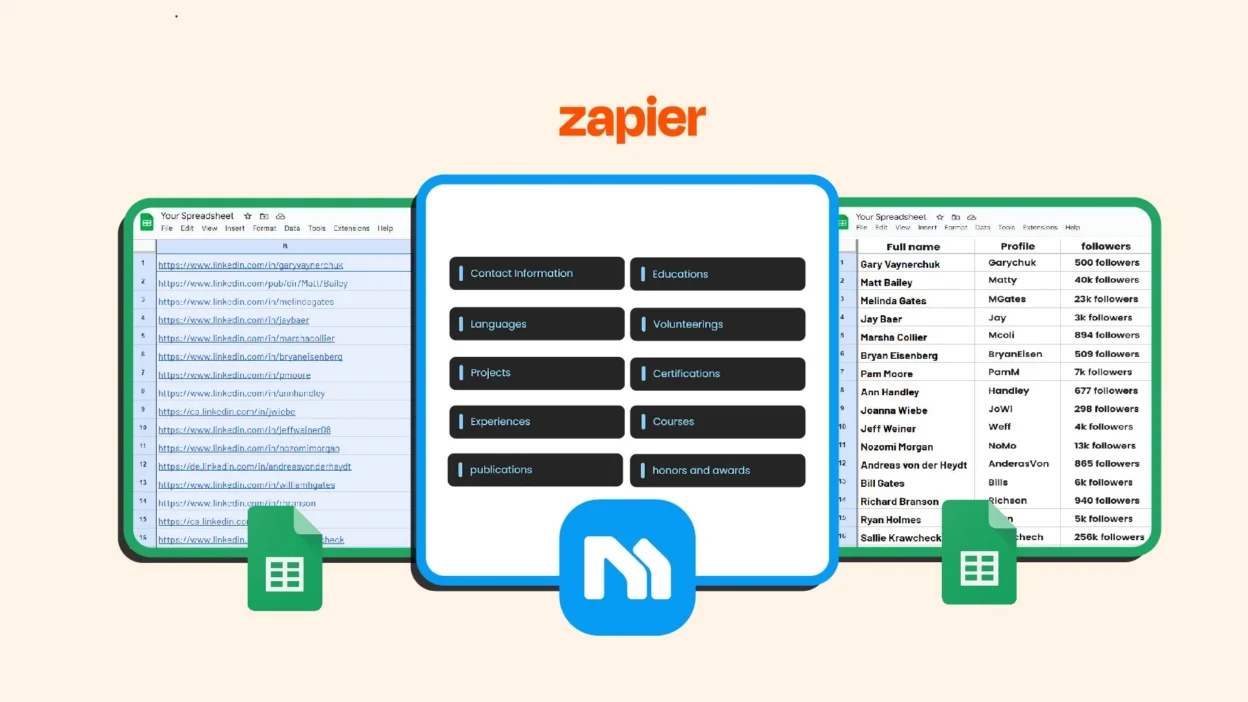
The task we want to automate in this tutorial is extracting profile data (using MagicalAPI’s profile data service) and writing it to a Google Sheet whenever a new profile username row is added to a Google Sheet.
How to Set Up Automated Profile Data Extraction with MagicalAPI and Zapier
In the previous tutorial’s first steps, we became familiar with the requirements for the MagicalAPI and Zapier integration. Here, I assume you already have accounts on both platforms and the “API Key” for your MagicalAPI account, so I will skip explaining those steps.
Step 1: Create a Zap with the Template
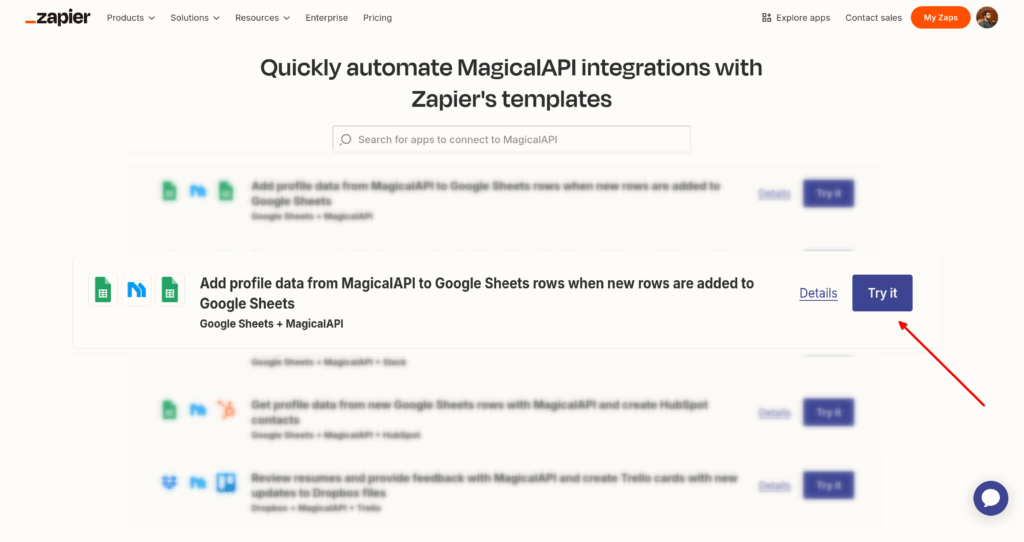
Start by heading over to MagicalAPI’s integration page on Zapier. Scroll down to the “Templates” section and find the one titled “Add profile data from MagicalAPI to Google Sheets rows when new rows are added to Google Sheets.” Click the “Try it” button to open the Zap editor.
Step 2: Configure the Zap Input Data in the Zap Editor
You’re now inside the Zap editor, the space where workflows come to life. You’ll see that the trigger and actions are already set up for you; no need to configure them yourself. That’s the advantage of using templates!
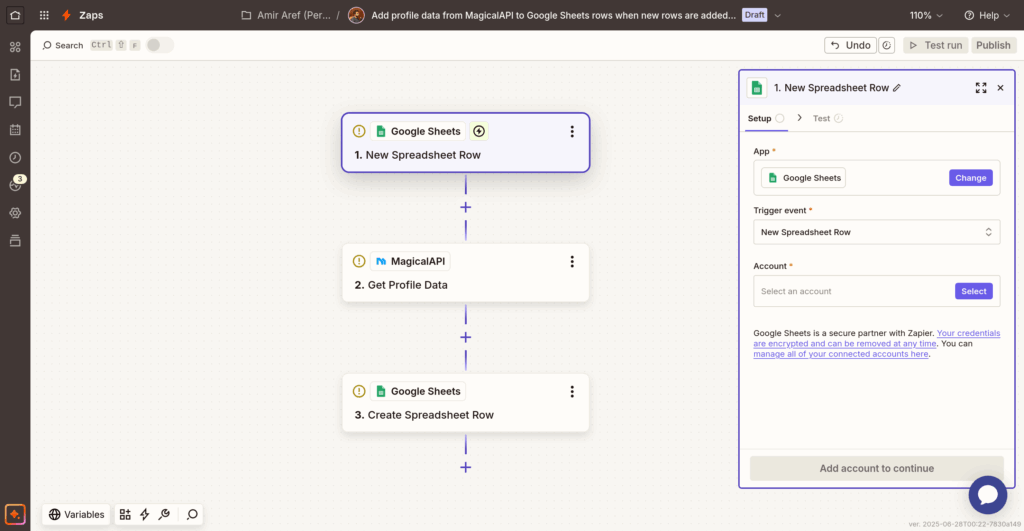
1. Start by connecting your “Google Account” in the first card (the trigger) to allow Zapier to access your Google Sheets account.
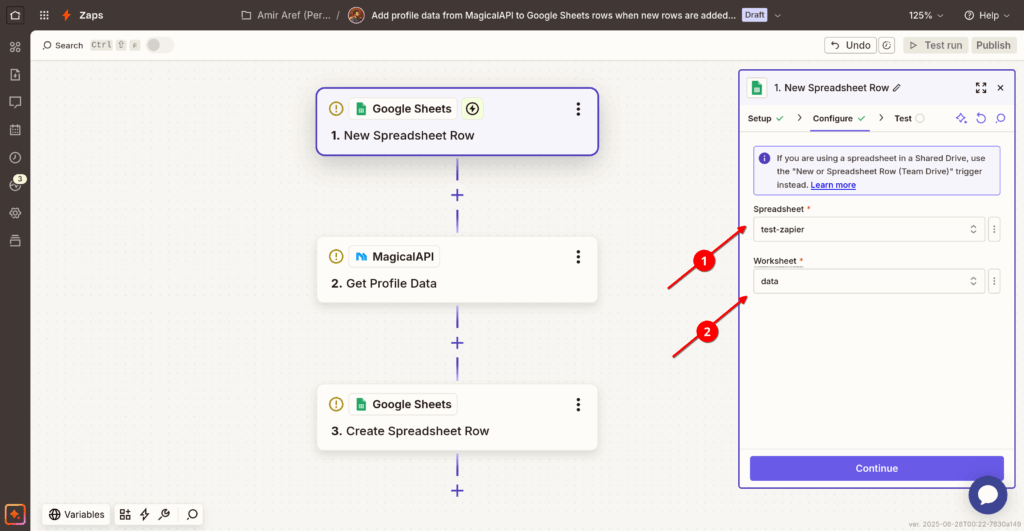
2. Next, select the Spreadsheet and its worksheet that you want the workflow to trigger when a new row is added. You should create a spreadsheet in Google Sheets beforehand.
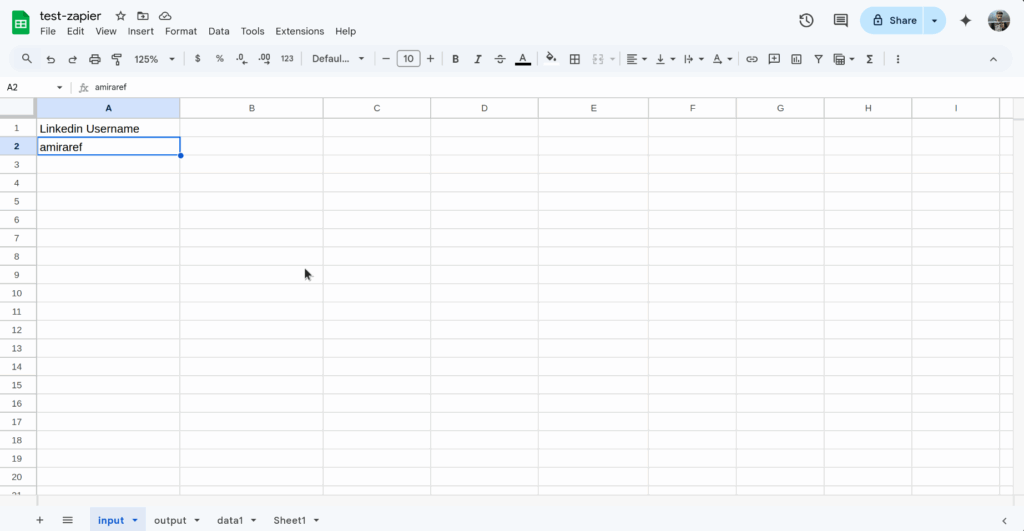
Here’s how my input spreadsheet looks. Note that the first row contains column headers and isn’t considered a data entry row. You can add a LinkedIn profile username, as I did in the second row, to test the trigger in Zapier.
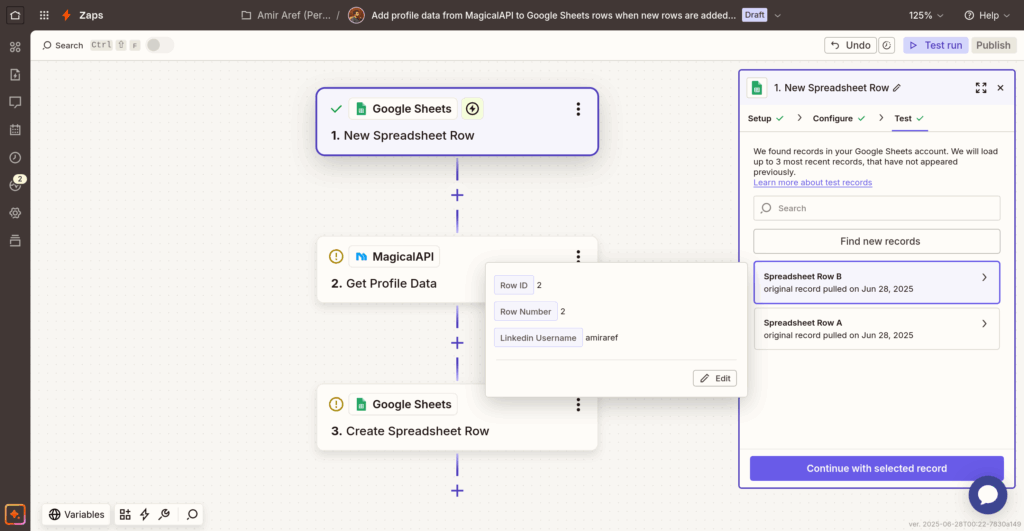
The test result of the Zap’s trigger shows the first entry row:
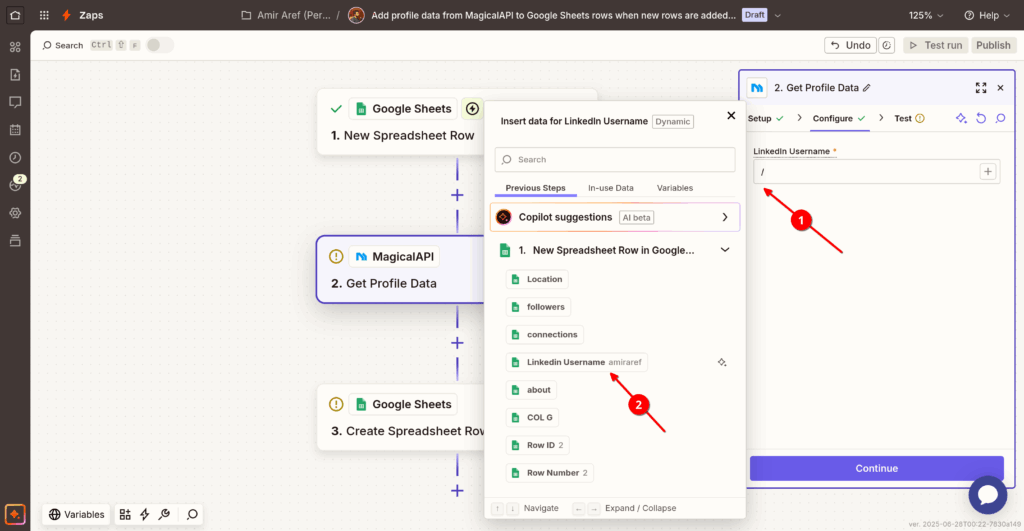
3. Next, configure the “Get Profile Data” action. First, in the “Account” field, connect your MagicalAPI API Key to Zapier. Then, in the “Configure” tab, provide the LinkedIn username for the profile data service. Use the columns from the Google Sheet in the previous step, which appear as dynamic input data (type a slash /):
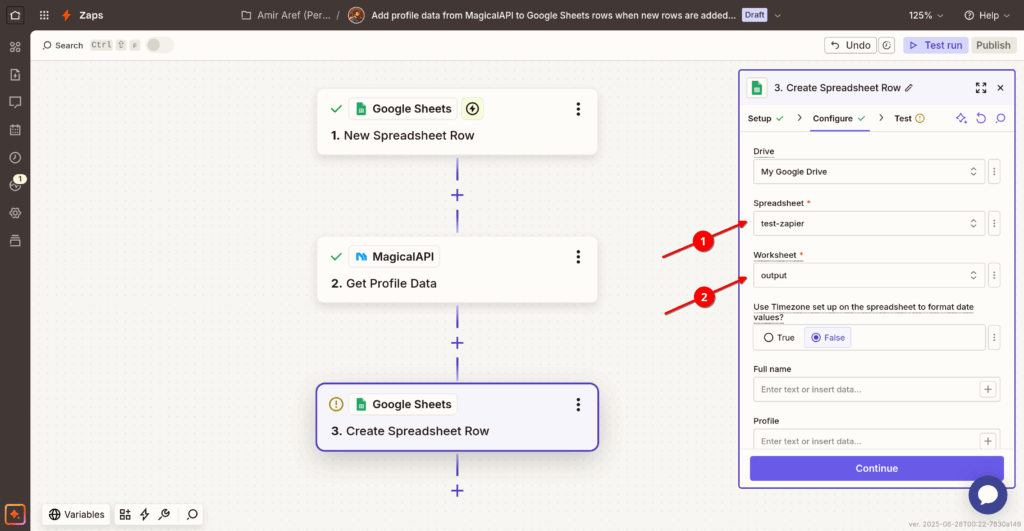
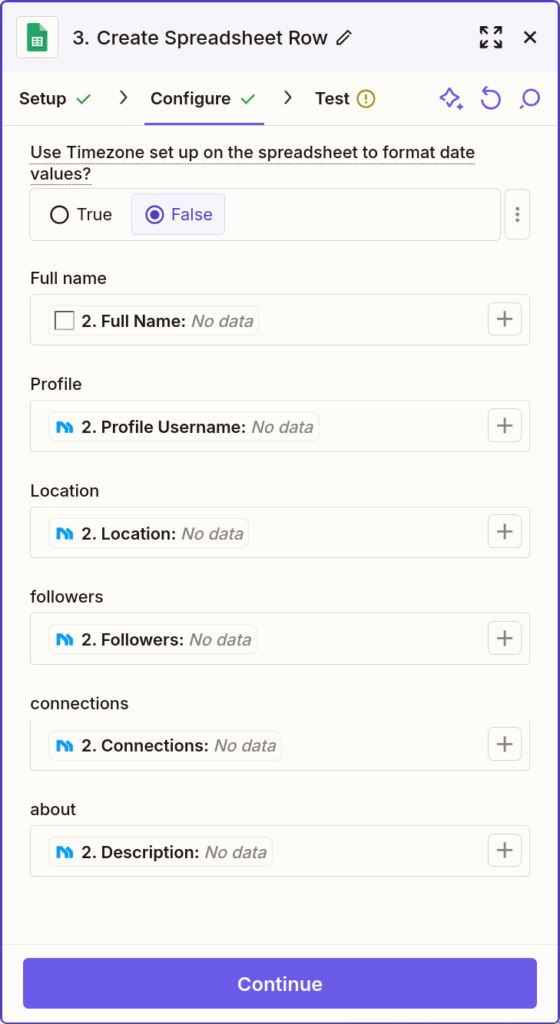
4. In the final action, “Create Spreadsheet Row,” configure how the new data should be added to the output spreadsheet. Just like the trigger, connect your Google Account. Then, in the “Configure” tab, select the Spreadsheet and Worksheet where you want the output data stored.
Note: The output Worksheet must differ from the one used in the trigger configuration to avoid a loop problem.
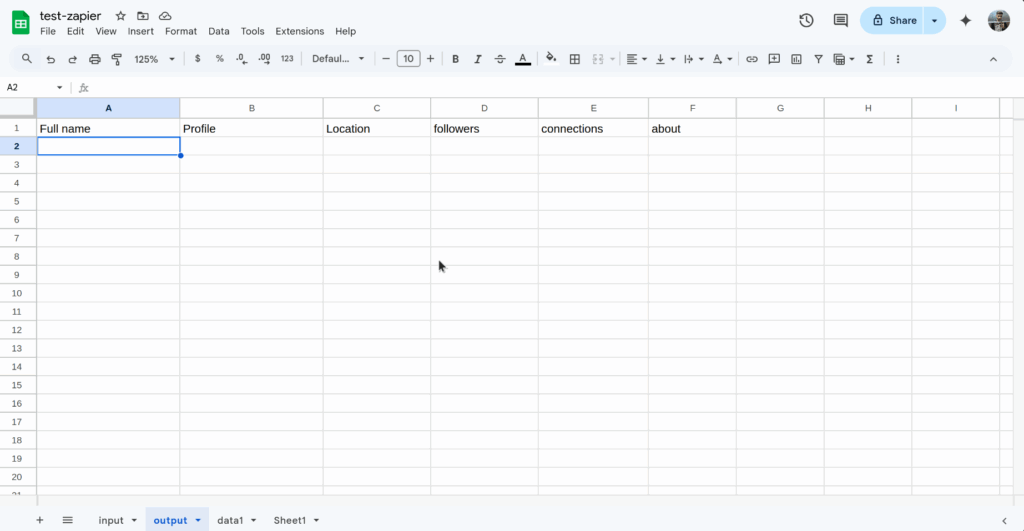
Also, the output Worksheet you select in Zapier should have column headers for the profile data you want. See this worksheet as an example:
Here’s the setup you’ll see for this action in the Zap editor:
“Next, map each column in the output worksheet to its corresponding value from the MagicalAPI Profile Data service response, like so:”
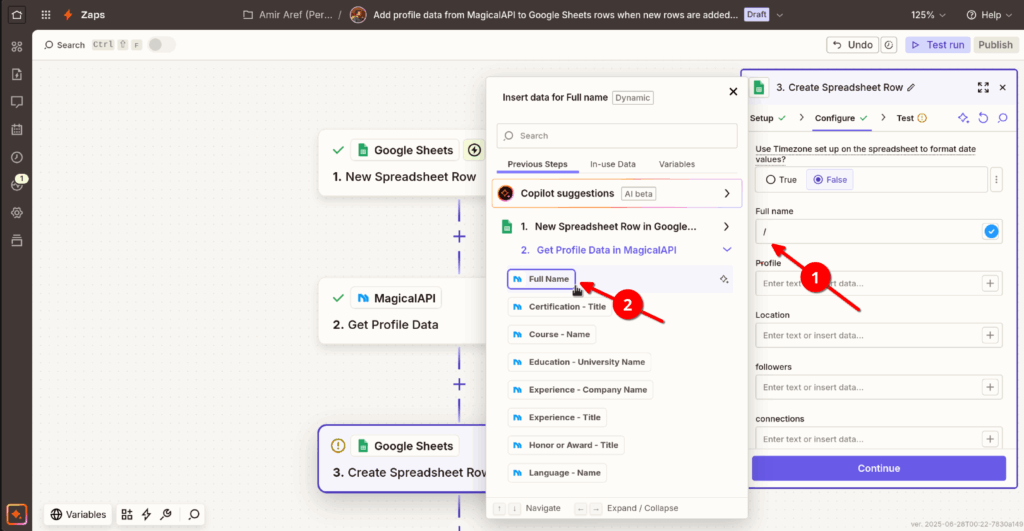
Map each field to its matching output parameter from the MagicalAPI profile data response.
5. You’re all set! Just hit ‘Publish’ in the top-right corner to make your Zap live.
Going forward, whenever a new profile username row is added to the selected input spreadsheet in Google Sheets, the data will be extracted using the MagicalAPI profile data service and stored in the output spreadsheet you configured.
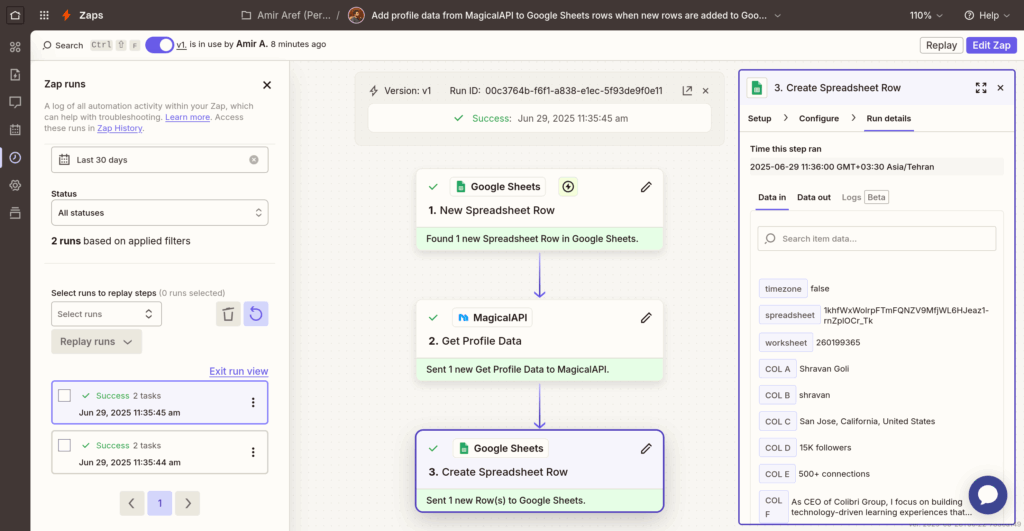
In the Zap editor page’s left menu, the “Zap runs” tab will display your history:
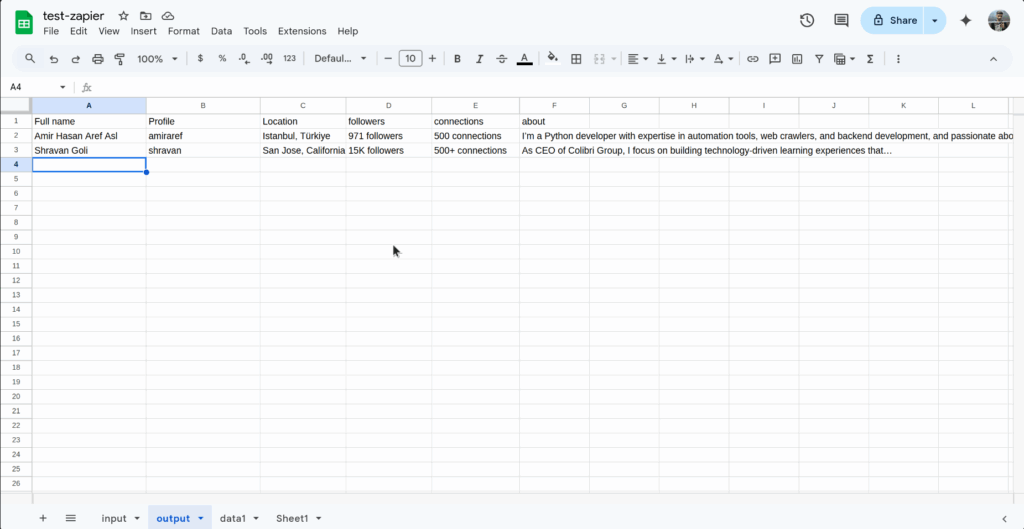
After feeding profiles into the input sheet and activating the Zaps, the output worksheet now appears like this.
Conclusion: Integration of MagicalAPI with Google Sheets
Say goodbye to manual data transfers. With pre-built Zap templates, integrating MagicalAPI with Google Sheets becomes effortless. These templates are designed to help you automate profile data extraction, organize it instantly in spreadsheets, and eliminate time-consuming copy-paste routines.
Whether you’re gathering candidate information, building lead lists, or tracking professional profiles, these automations work behind the scenes, no coding required. Just plug in the template, customize it to your use case, and let it run. This guide shows how you can streamline repetitive tasks without coding, enhancing efficiency and freeing up time for more critical priorities. Check out this template to see how it works for you, and stay tuned for more automation tips from MagicalAPI!