Zapier is a no-code platform that enables you to connect and integrate a wide range of apps, including Google Apps, Meta, Microsoft, Amazon, and many others, allowing you to build automation tools without requiring any coding skill, This powerful combination can save you time, reduce errors, and boost productivity by automating routine tasks.
Table of Contents
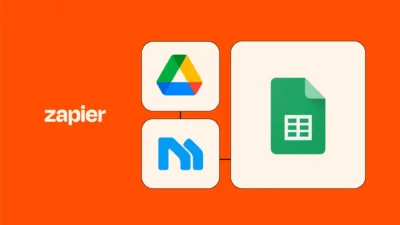
Integrating MagicalAPI with Zapier
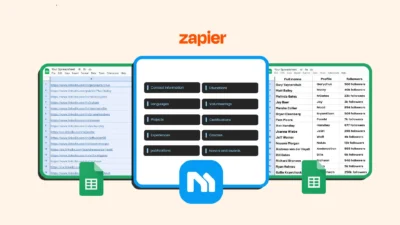
By integrating MagicalAPI services with Zapier, you can connect thousands of applications to MagicalAPI solutions, such as the Resume Product and Data Product, to automate workflows and simplify repetitive tasks without the need to write a single line of code.
Step-by-Step Guide to Using MagicalAPI with Zapier
Step 1: Create a MagicalAPI Account
First, you need to have an account on Magical API with API Access. After logging into your panel, get a Pro Plan from the Pricing page (the Basic plan does not support API access).
Step 2: Get Your MagicalAPI API Key
Now, after activating your account plan, it’s time to create an API Key for your account. The API Key is a code similar to a password that provides access to your MagicalAPI account from Zapier (or other platforms).
Here’s how to get it from the panel:
1. Go to the “API info” tab in the MagicalAPI panel and generate an API key:
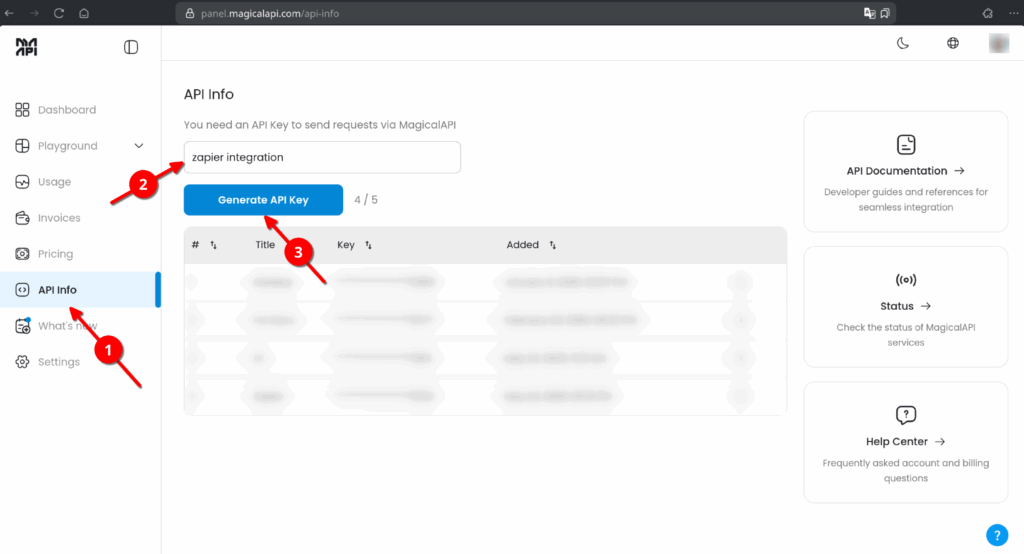
2. Now, after it has been generated, copy it using the button and store it in a safe place (a note-taking app or something else), because you won’t be able to see it again, though you can generate new ones.
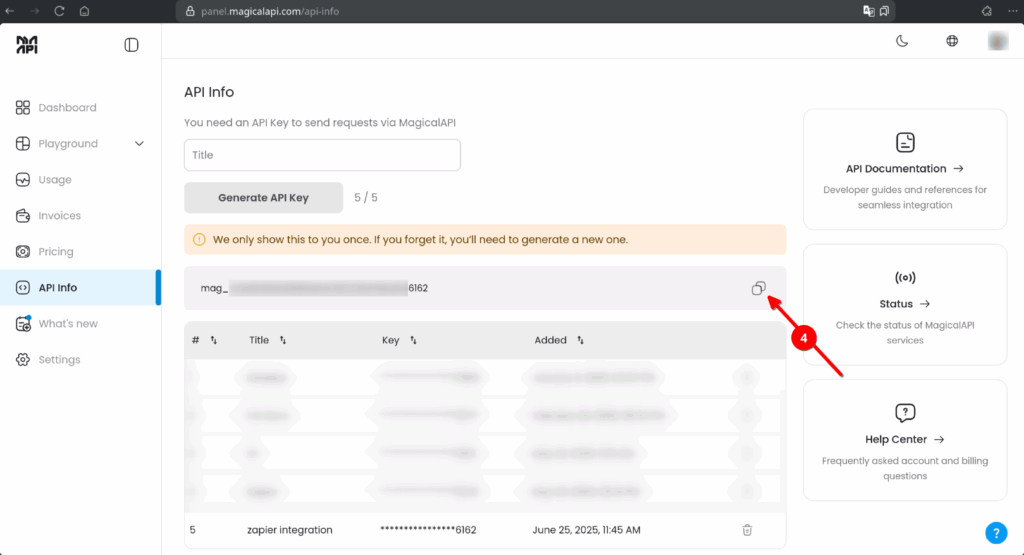
Don’t share your API Key publicly or with anyone you don’t trust; it’s a secret, like a password.
Step 3: Set Up a Zapier Account
We will continue the process of working magic in Zapier, where we will connect MagicalAPI to other apps.
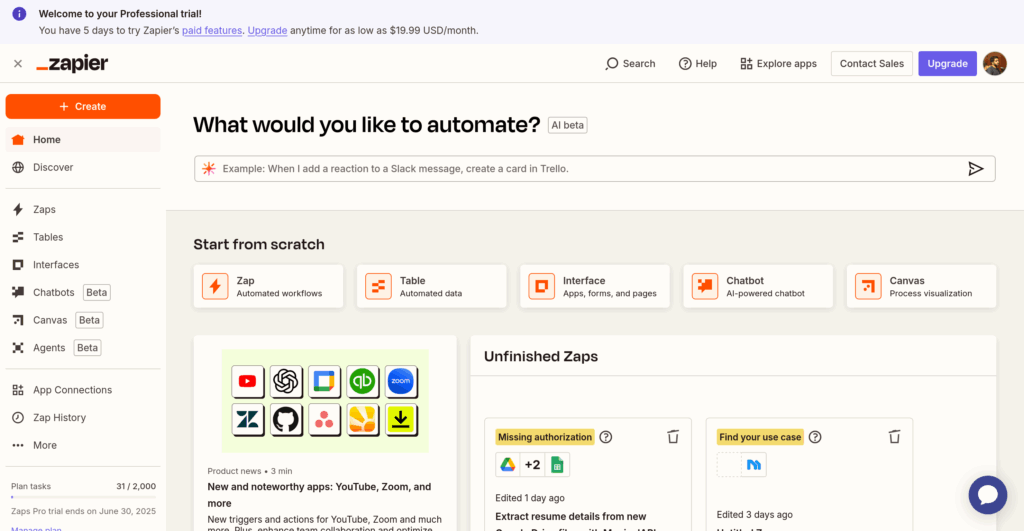
Like MagicalAPI, you need to have an account on Zapier.com. Its Free plan is good enough for testing with a limited number of automation. After you log in, the Zapier dashboard home should look like this:
Step 4: Create a Workflow (Zap) in Zapier
A “Zap” is an automated workflow in Zapier that includes a trigger and at least one action. The MagicalAPI integration with Zapier offers actions to access our services, such as parsing resumes or fetching LinkedIn profile data with the LinkedIn profile Scraper, but does not provide triggers. You’ll start with a trigger from other apps (such as Google Sheets or Google Drive) and then add the MagicalAPI actions.
Here’s a brief explanation to understand the difference between a trigger and an action in Zapier (based on Zapier docs):
- Trigger: Every Zap has a single trigger. Triggers are how your app’s users can start automated workflows whenever an item is added or updated in your app.
- Action: An action is the next and completion step in a Zap (which may use output data from the trigger or previous steps). In general, doing something or getting data are actions. For example, getting details of a resume is an action in the MagicalAPI app in Zapier.
Follow these steps to get familiar with the process of creating a Zap in Zapier with the MagicalAPI app:
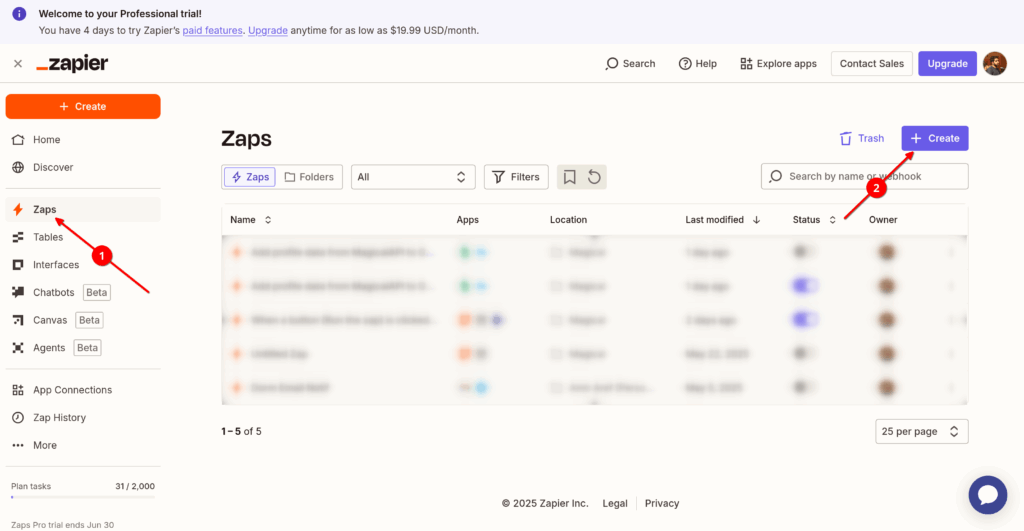
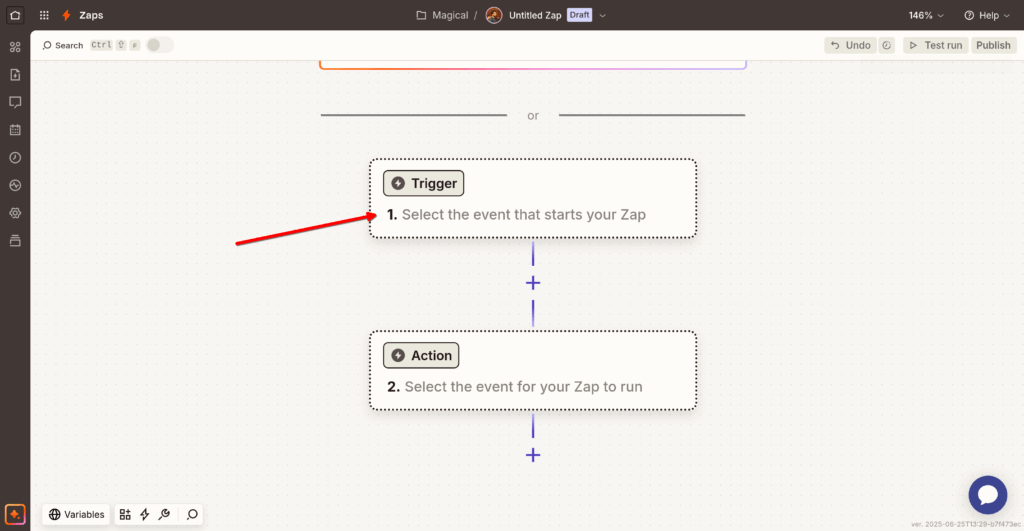
1. Go to the Zaps page in the Zapier dashboard and create a new Zap:
2. Then you will see the Zap editor page. This is where you create your workflow by setting up the trigger and adding the action(s). So, we’ll start by adding the trigger:
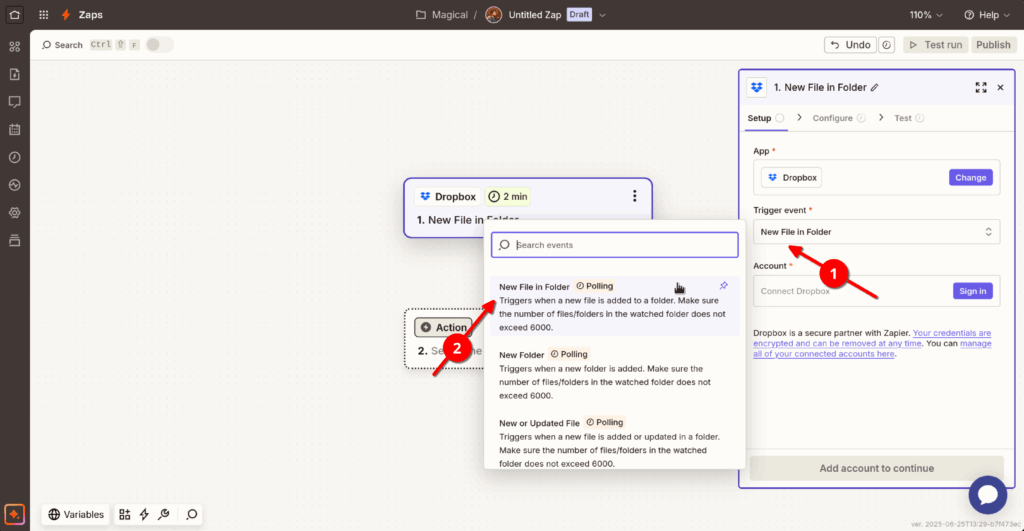
3. After selecting an app for the trigger (here we selected Dropbox), you must select a “Trigger event” for this app, like “New File in Folder” in this case:
4. Then you have to connect your account for this app to Zapier, which is different for each app. Just click “Connect …” and log in to your account or provide any authentication information it requires (like an API Key).
5. After this, fill out the next requirements that will come up on the “Configure” tab until the trigger is created.
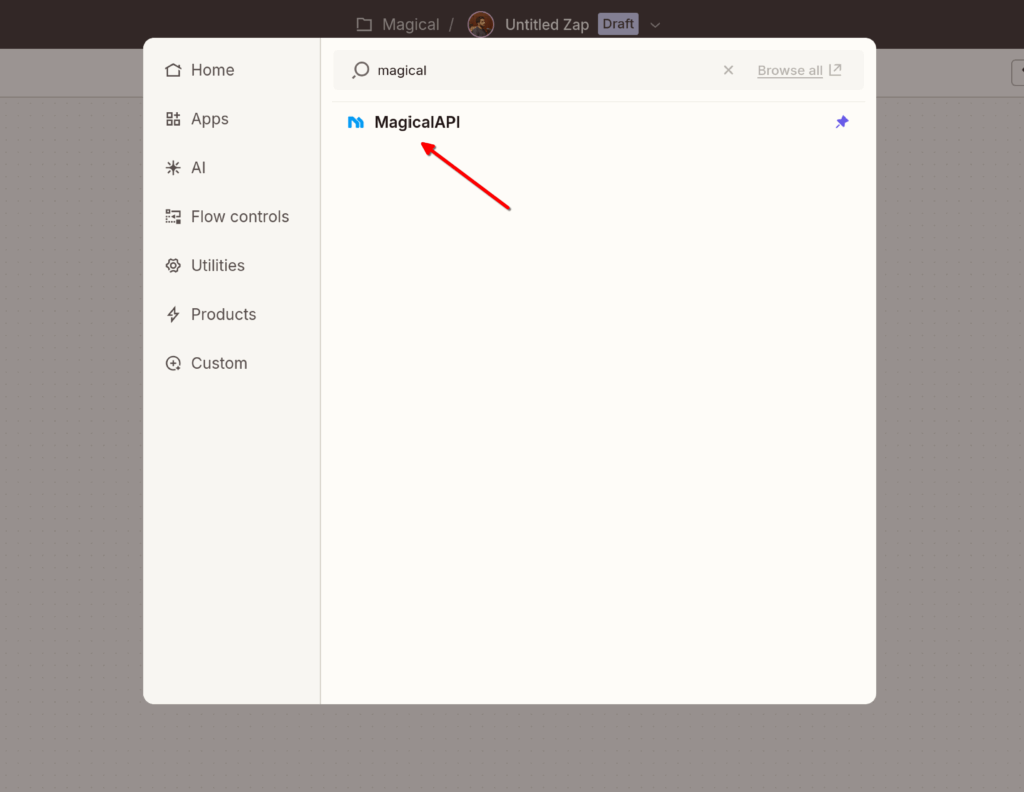
6. Now it’s time to add the action. Just click on the action card, and a popup will show the list of applications. Look for “MagicalAPI” among them and select it:
7. Then, like the trigger, select an “Action event” from the right-side card of MagicalAPI actions. In this case, we’ll select the “Extract Resume Details” action.
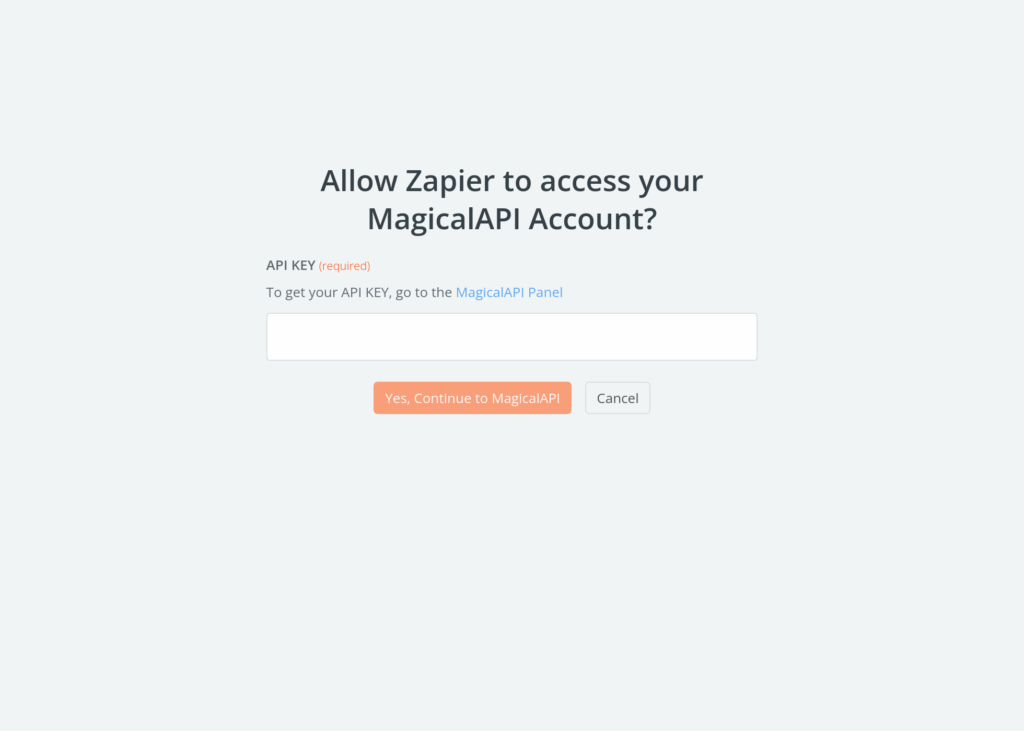
After this, it’s time to connect your (MagicalAPI account to Zapier. When you click “Connect MagicalAPI account,” the following popup will come up, and this is where you should use the MagicalAPI API Key you got in Step 2. Just paste it in the input box:
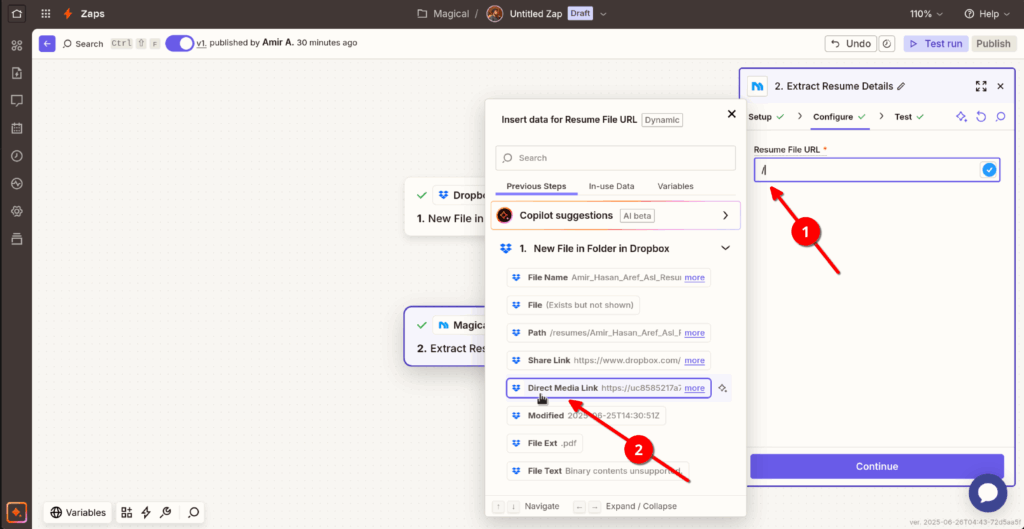
8. In the next tab of the action, named “Configure,” you should fill out and configure the input parameters of the action. In this case, for the “Extract Resume Details” action, we currently just need the resume’s file URL. We can get the direct link of the file uploaded in Dropbox from its trigger output data. To access this, just type a slash (/) and, in the opened popup, select the “Direct Media Link”.
9. Now it’s done, and you can publish your Zap (from the top right corner).
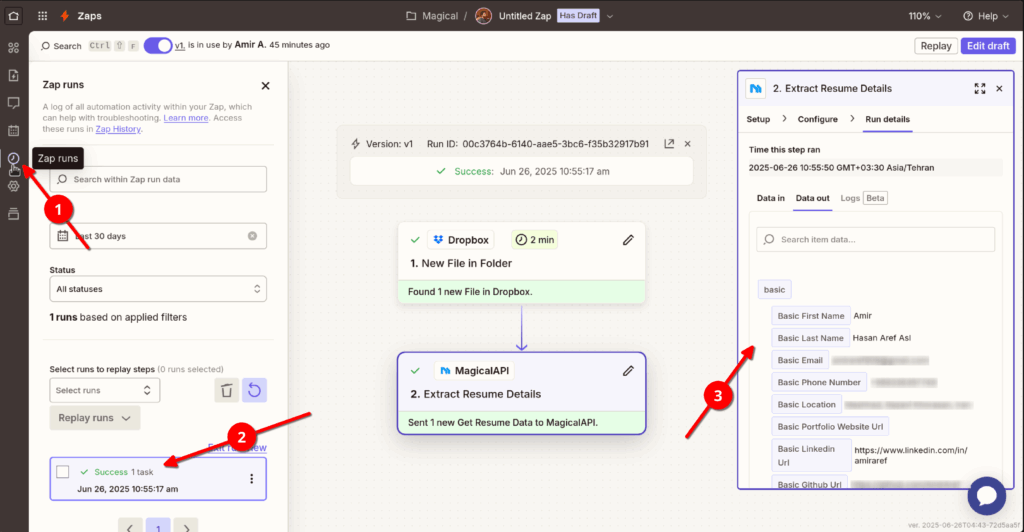
From now on, every time you upload a resume file in the selected folder in Dropbox, it will be parsed using MagicalAPI’s Resume Parser service, and you can see its extracted details in the Zap page (or save it somewhere using other actions). The Zap run history will be shown in the “Zap runs” tab in the left menu of the Zap editor page:
Conclusion: Zapier and MagicalAPI integration
In this tutorial, we have introduced the Zapier and MagicalAPI integration and created a workflow to automate the parsing resumes task through a step-by-step guide without writing a single line of code. This is just the beginning of a journey that gives you the ability to create many tools and implement your ideas without needing advanced technical skills.
In future posts, we’ll do more things with this integration. Happy doing magic!